Fresh baked numbers, anyone?
So sorry about not being timely with my weekly post — instead of writing for my blog yesterday during Sara’s nap, I was in the midst of glue and paper scraps and buttons and glitter. As a result, though, this week’s content is about as fresh as it gets!
I’m starting work on my December Daily (an album project started by Ali Edwards a few years ago, and since adopted by legions of her fans ![]() ), as this year I’m determined to make an actual, physical album instead of simply recording the season here on my blog. So, I’m following Ali’s lead in creating my “foundation pages” for the album, well in advance. It’s been a treat getting into the “Christmas spirit” so early — hopefully I’ll still be excited by the time December actually arrives.
), as this year I’m determined to make an actual, physical album instead of simply recording the season here on my blog. So, I’m following Ali’s lead in creating my “foundation pages” for the album, well in advance. It’s been a treat getting into the “Christmas spirit” so early — hopefully I’ll still be excited by the time December actually arrives.
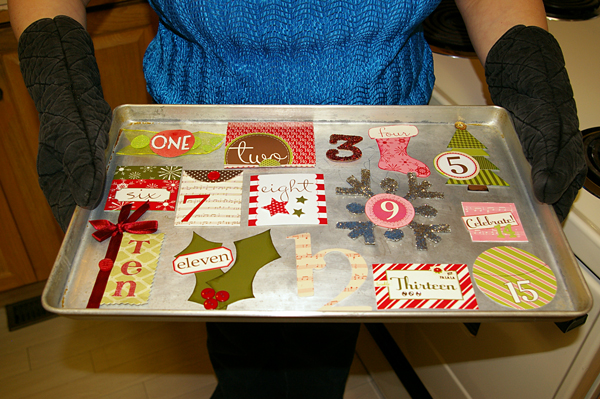
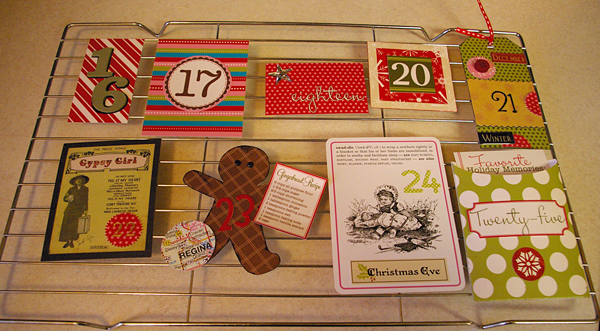
I haven’t actually constructed the album pages yet, as I decided to start with the numbering for my pages. These are a combination of “cake mix” and “from scratch” — I picked up a hybrid (printable digital images) kit from Elle’s Studio, which was intended for making an advent calendar, and adapted it to work for December Daily. I think the only ones that I made exactly “by the recipe” were the silhouetted “12″ and the very glittery “9″ — I used almost an entire bottle of glitter, and pressed it down with a brayer, so that sparkly stuff isn’t coming off the snowflake. (It’s not coming off the brayer, either! — though I’ve mostly removed it from my desk, the sink, etc.). The others that are from the kit I added bits to, such as word stickers, inking, buttons and “bling”, or took elements away/added replacements.
I made a couple of the numbers out of “scraps” from other pieces, including the “14″ (a bit of the pink music paper from the kit’s “16″, the “celebrate” from another piece, and some green Thickers numbers), “16″ (foam number stickers, black pen and a piece of the patterned paper from “13″), and the “21″ (a tag from the kit’s “1″, and elements from my stash).
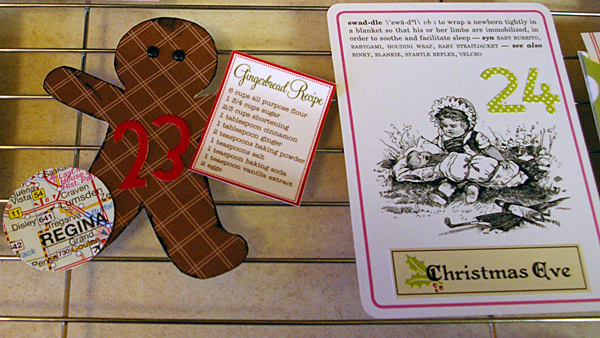
I am rather pleased with my “from scratch” numbers, and the ones that I changed the most. “1″ was made with a piece of translucent ribbon and a piece of cardstock to which I added black number stickers as a mask, then sprayed with several colours of ink, and peeled off the stickers, then edged with black ink. I kind of like the spots where the ink “bled” under the stickers, giving the letters a funky edge. The gingerbread man (“23″) was originally #14, and I kept his recipe and basic shape, but gave him a new number with some fuzzy Doodlebug numbers, some black mini-brad eyes and some extra “browning” with ink. I also added a punched out piece of a Saskatchewan map showing the city where my parents live, as we will be arriving there that day.
For “22″, I found a 7Gypsies vintage ephemera card, with a poster for the movie “Gypsy Girl”, as that’s the day we’ll be on the road to my parents’ home. “10″ uses the basic structure of the kit sample, but I made the little vertical pocket out of a piece of pinked fabric (from K and Company, I believe) and a ribbon that was on a gift I received a while back, so it was already nicely tied. I think Dec. 10 is the day we are having a gift exchange with Bryan’s siblings, so that should work nicely in the album. And then for “24″ — we have a stack of funny “parenting flashcards”, and I found the word “swaddle” in the box. I had the Scripture about the babe wrapped in swaddling clothes and lying in a manger in mind, and Dec. 24 in Regina always includes a beautiful evening worship service at my parents’ church, so I decided to go with that.
So that’s what I’ve been working on. This post is rather long already, so since Corrie has posted my last two layouts on her blog and done a nice job with it, I will just link you up to it. You might like to see my guest designer feature on the Burlap & Buttercups blog as well.
Thanks for stopping by. ![]()
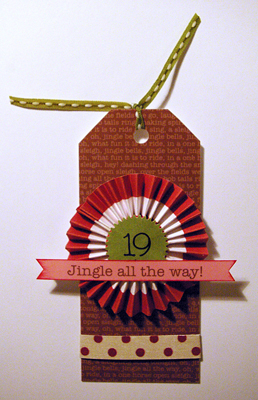
Edited to add: You may have noticed that there is no “19″ in the photos above. I have finally finished that one, as of nearly midnight — as you will see, it involves an accordion flower, and between my troubles with that and my difficulties with the tissue paper flower I tried to make during the Crop and Create event I went to in September, I’m starting to think I have as much of a black thumb with paper flora as I do with the real kind! Bryan and I finally got it figured out, although we got the accordion too tight and I had to make a few modifications to the piece as a result. Here it is. ![]()
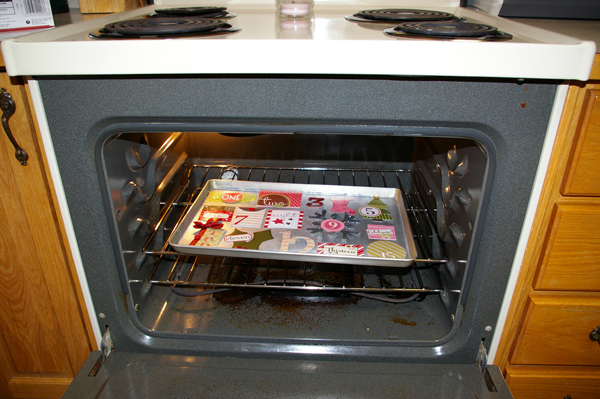
The photo in the oven is too funny!!! I kept wondering, what kind of tip is Carmen going to share??? Why does she use the oven for her embellishments???LOL
Your numbers look fantastic, love the variety! Can’t wait to see more of your preparations!
Great start on your DD! Those are really cute!!
Wow love the numbers! Such great work!!